F22: Bob Burgers

Contents
Project Title
Soccer Pong
Abstract
Parking Frenzy is car parking video game. The player will be able to move the car in right or left direction, the road itself will be descending towards the car and will also consist of obstacles such as other vehicles. The road will have lanes through which the car must navigate to ultimately be able to slot itself into the right parking spot alongside the road. The parking spots will be randomly generated along the edge of the LED matrix and the player must navigate the car into the spot at the right time or else it will result in a crash. The difficulty of the game will increase as the player reaches a certain amount of points. The difficulty will increase in terms of the speed of the car and the number of obstacles. The final score of the player will be displayed at the end of every game. a speaker attached to the board will generate the game sounds.
Objectives & Introduction
Show list of your objectives. This section includes the high level details of your project. You can write about the various sensors or peripherals you used to get your project completed.
Team Members & Responsibilities
William Hernandez

Responsibilities
- Led Matrix Graphics
- Gameplay Logic
- Music System Integration
- Game Objects and Hit Detection
- Debugging and Testing
Tin Nguyen
- File:Put picture file here
- PCB
- Music Development
Matthew Hanna

Responsibilities
- Joystick input with ADC reading potentiometer positions for paddle movement
- GPIO input for button pressing pause and reset
- locking mechanism for game pausing and game reset loop entrance
- enclosure fabrication
Schedule
| Week# | Start Date | End Date | Task | Status |
|---|---|---|---|---|
| 1 |
|
|
|
|
| 2 |
|
|
|
|
| 3 |
|
|
|
|
| 4 |
|
|
|
|
| 5 |
|
|
|
|
| 6 |
|
|
|
|
| 7 |
|
|
|
|
| 8 |
|
|
|
|
| 9 |
|
|
|
|
| 10 |
|
|
|
|
General Parts
| Item # | Part | Seller | Quantity | Total Cost |
|---|---|---|---|---|
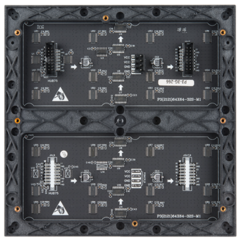
| 1 | 64x64 RGB LED Matrix | Sparkfun | 1 | $85.95 |
| 2 | SJ-2 Boards | SJSU | 1 | $50.00 |
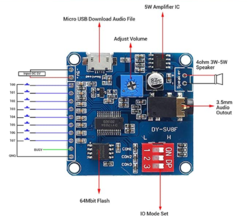
| 4 | PEMENOL Voice Playback Module | Amazon | 1 | $10.19 |
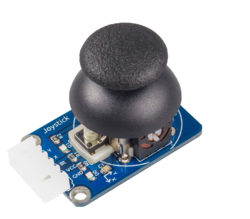
| 5 | Joysticks | Amazon | 2 | $20.00 |
| 6 | 5v Power Supply | Amazon | 1 | $15.19 |
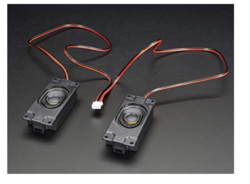
| 7 | Enclosed Speaker Set - 3W 4 Ohm | Amazon | 1 | $12.48 |
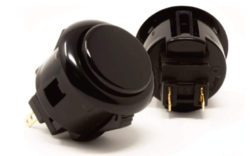
| 8 | Buttons | Amazon | 2 | $8.95 |
| 9 | Standoffs | Amazon | 1 | $24.95 |
| 10 | PCB | [link Seller] | 1 | $40.00 |
| 11 | Aluminum Enclosure | Anchor Electronics | 1 | $45.12 |
Design & Implementation
The design section can go over your hardware and software design. Organize this section using sub-sections that go over your design and implementation.
Pin Configuration
-
Pin# LED Matrix Pin SJ-2 PIN R1 High Red Led Data P0_6 G1 High Green Led Data P0_7 B1 High Blue Led Data P0_8 R2 Low Red Led Data P0_26 G2 Low Green Led Data P0_9 B2 Low Blue Led Data P1_31 A Mux row select A P1_20 B Mux row select B P1_23 C Mux row select C P1_28 D Mux row select D P1_29 E Mux row select E P2_4 OE Output Enable P2_2 LAT Data Latch P2_1 CLK Clock Signal P2_0 MP3 Module RX UART Receive P4_28 TX UART Transmitter P4_29 Buttons Either Pin Pause Button P2_5 Either Pin Reset Button P2_6 Joysticks X Player 1 P1_30 X Player 2 P0_25 -
Hardware Design
Discuss your hardware design here. Show detailed schematics, and the interface here.

Hardware Interface
In this section, you can describe how your hardware communicates, such as which BUSes used. You can discuss your driver implementation here, such that the Software Design section is isolated to talk about high level workings rather than inner working of your project.
Software Design
Show your software design. For example, if you are designing an MP3 Player, show the tasks that you are using, and what they are doing at a high level. Do not show the details of the code. For example, do not show exact code, but you may show psuedocode and fragments of code. Keep in mind that you are showing DESIGN of your software, not the inner workings of it.
Implementation
This section includes implementation, but again, not the details, just the high level. For example, you can list the steps it takes to communicate over a sensor, or the steps needed to write a page of memory onto SPI Flash. You can include sub-sections for each of your component implementation.
Testing & Technical Challenges
Describe the challenges of your project. What advise would you give yourself or someone else if your project can be started from scratch again? Make a smooth transition to testing section and described what it took to test your project.
Include sub-sections that list out a problem and solution, such as:
<Bug/issue name>
Bugs
- Joystick input had a fixed paddle speed
- Pause and Reset buttons service with ISR was difficult to debounce, moving button input detection to a Task would be more practical
Conclusion
Conclude your project here. You can recap your testing and problems. You should address the "so what" part here to indicate what you ultimately learnt from this project. How has this project increased your knowledge?
Project Video
Project Source Code
References
Acknowledgement
Any acknowledgement that you may wish to provide can be included here.
References Used
List any references used in project.
Appendix
You can list the references you used.
-


